Sometimes, it is necessary to change your partition layout in order to create new partitions or extend an existing partition, for example after a VPS / VDS upgrade.
This tutorial shows how to easily change your partition layout on your VPS or VDS.
Please be advised to perform a backup of all important data before proceeding ! Changes to the partition table always bear the risk of complete data loss.
Linux
Step 1:
Boot your VPS / VDS into the rescue-system, this can be done within your customer control panel.
You will need to connect through VNC.
After you have established a connection login as “root”.
Step 2:
To perform changes on the partition easily we are going to use gparted.
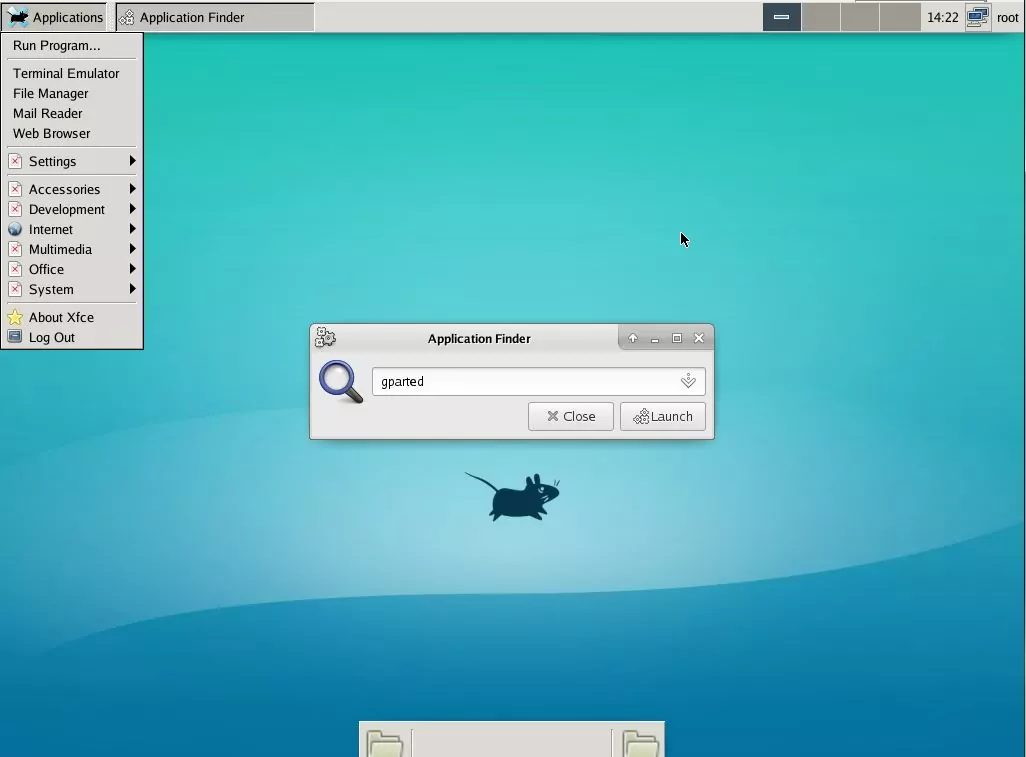
To start the GUI type “startxfce4” within your VNC console and wait a few seconds until the graphical interface appears.
On the upper left side you will see “Applications”, open it and select “Run Program”.
Now type “gparted” within the application finder and the app should start immediately.
Step 3:
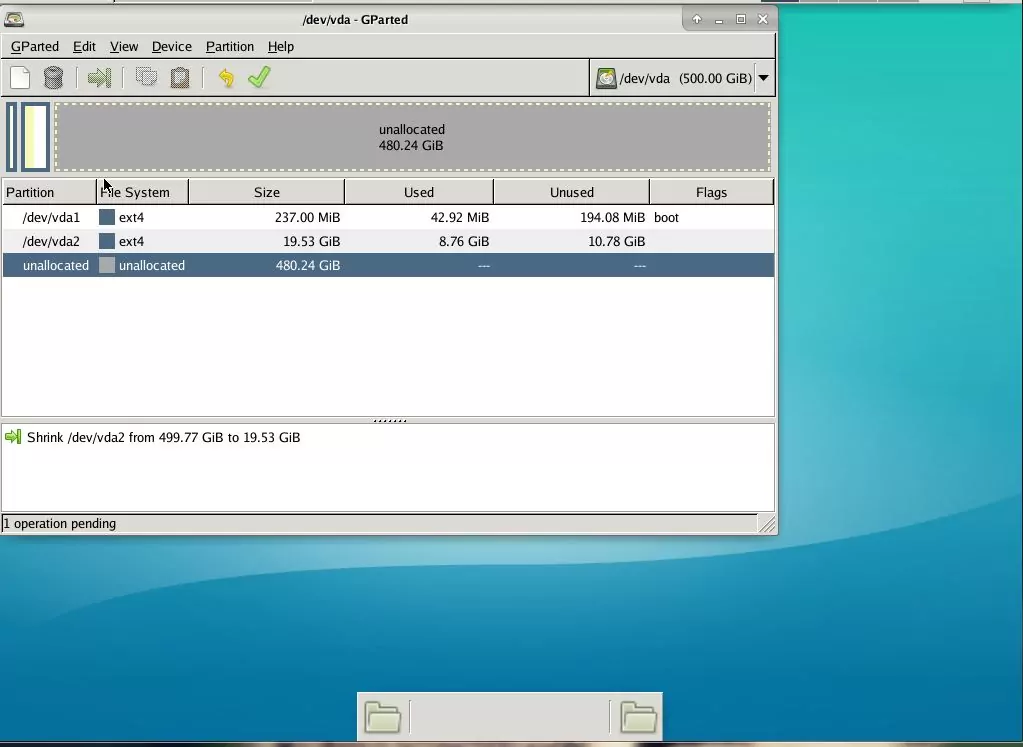
You should find an overview of all existing partitions on your hard disk drive.
In case there is no unused space left, we need to shrink one existing partition first, otherwise we will not be able to create a new one.
After a right click on the corresponding partition and choosing “Resize/Move”, the partition can be either shrunk or extended.
Please note that LVM partitions (which are used with CentOS by default) cannot be shrunk!

In case you only wanted to extend your existing partition, please proceed with step 5.
Step 4:
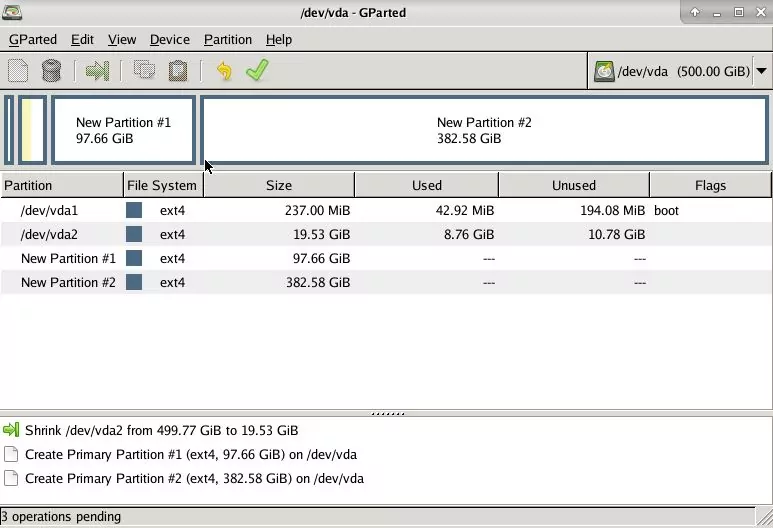
Creating new partitions on the recently freed up/already free storage.
Perform a right click on the unallocated space and select “new” to create a new partition.
In this case I did it twice to create two additional partitions.
Step 5:
So far, no actual changes have been made on your hard drive. If you want to restart the partitioning just rerun the gparted tool.
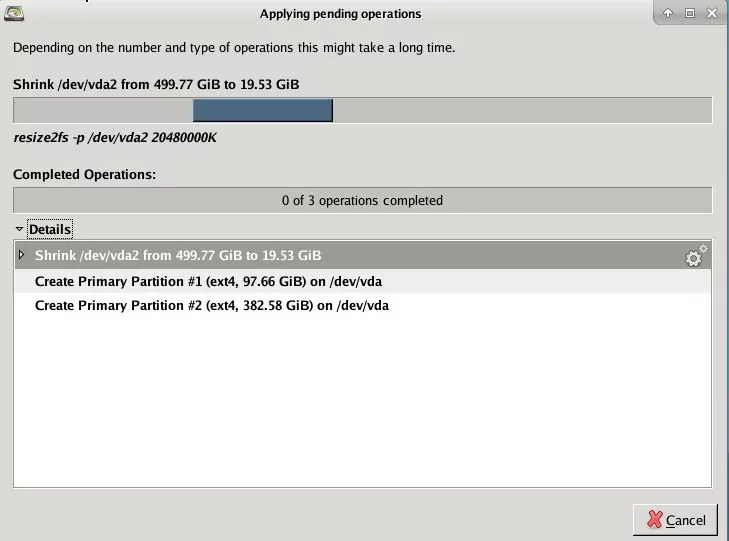
To write the changes to the HDD hit the green tick symbol.
After hitting the tick, a warning will appear saying that you can lose all data – you should have a backup, so no worries.
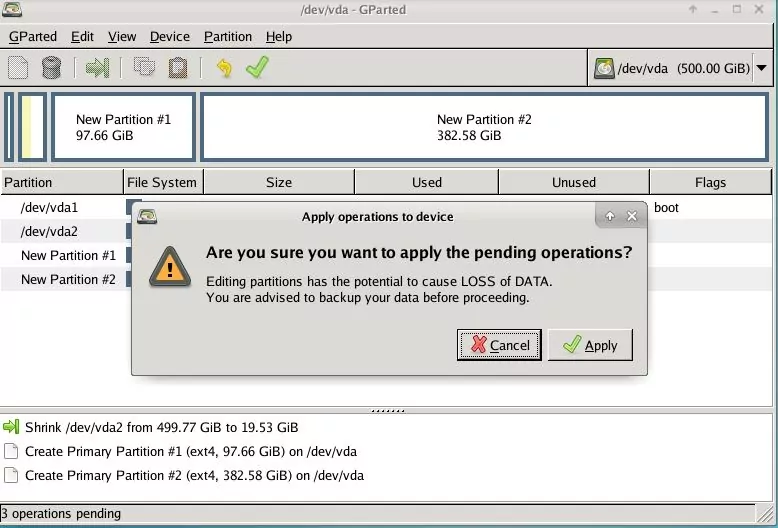
The application should start performing several tasks, just wait until it has finished.
Depending on the size of the partition and the data stored on it, this will take its time.
Additonal Step for LVM :
For LVM it is necessary to not only extend the size of the LVM partition, but also to extend the size of the Volume – in this scenario we are going to extend the “root” Volume
Connect via SSH and perform the following additional steps :
1. Bring online the LV
root@contabo-test:~# lvchange -a y cos
2. Print the available (free) storage capacity within the LVM, in this case it is 300 GB
root@contabo-test:~# vgs
VG #PV #LV #SN Attr VSize VFree
cos 1 1 0 wz–n- 599.02g 300.00g
3. Extend the volume to use 100% of the available storage capacity
root@contabo-test:~# lvextend /dev/cos/root -l +100%FREE
Size of logical volume cos/root changed from 300.00 GiB (76800 extents) to 599.02 GiB (153349 extents).
Logical volume root successfully resized.
Step 6:
You are done, just boot up your VPS /VDS into the regular OS and check if everything is as expected:
root@contabo-test:~# fdisk -l
Step 1:
Connect to your server using RDP.
Step 2:
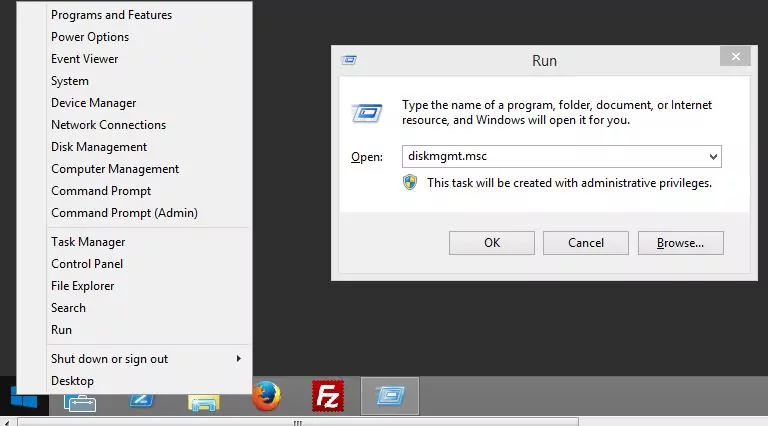
Open the “Disk Management”, this can be done with a right click on the Windows Icon on the lower left side.
You could also start it by opening the “run” prompt, which can be done via “Start” -> “Execute” -> “diskmgmt.msc”, alternately the “Execute” dialogue can be opened by hitting “Windows-Logo-Key +R”
Step 3:
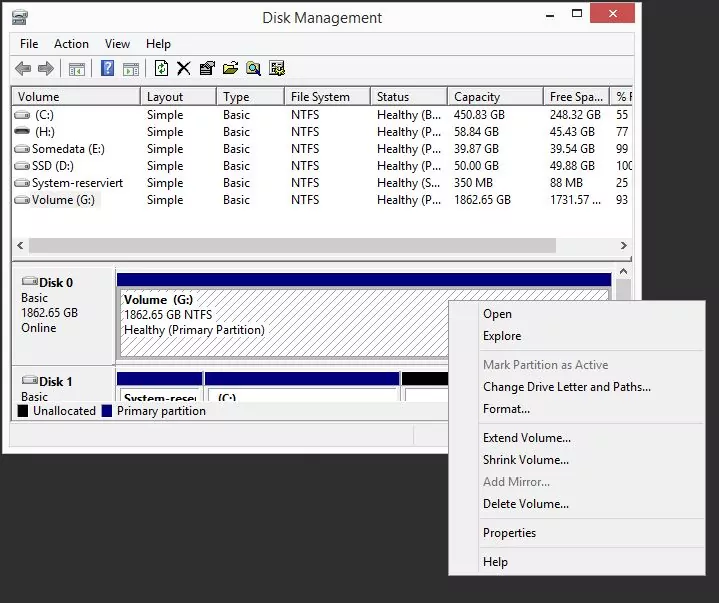
After the Windows “Disk Management” utility was started you will see an overview of all installed harddrives.
On a VPS / VDS you will usually have one drive, on a dedicated Server you will probably have more than one sparse disk.
Search for the disk you want to repartition and perform a right click on the partition you want to resize.
You can shrink and also extend a Volume, sometimes when upgrading your VPS / VDS to a bigger plan you can either create a second partition or just extend the existing partition.
For now we want to shrink the existing partition, so we hit “Shrink Volume”.
Step 4:
After some time passed you will see a popup, just fill out the field with the amount of space you want to free up and hit “shrink”.
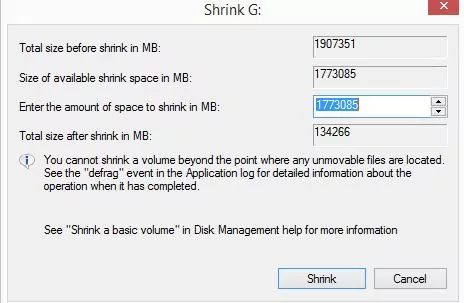
After shrinking you will have unallocated space, now you are ready to create a new partition, e.g. a FAT32 filesystem etc.


