
In today’s digital age, passwords are more prevalent than ever. Many of us use social media, online banking and much more. All these accesses are secured with passwords, among other things. Ideally, you should use a different password for each platform, which is also long and contains special characters and numbers. With all these passwords, it is easy to lose track of them. This is where password managers come into play.
Bitwarden is a popular password manager, which is open source. There is a free as well as a paid version hosted by the company behind Bitwarden, or you can host a Bitwarden instance yourself. We will show you how to do that today.
There are two ways to install a Bitwarden instance. If you plan to run only Bitwarden on a given virtual machine you should pick Bitwarden standalone variant. If you also want to use the server for a different purpose you need to use a “modified” Rust-written variant of Bitwarden. You can read more about “Vaultwarden” here.
Table of Contents
Installing Bitwarden Server (Standalone)
The installation of the Bitwarden Standalone variant is very easy, because the developers of Bitwarden provide a ready-made installation script.
Requirements
- A server with Linux operating system (e.g. a VPS)
- Root access to the server
- A (sub)domain already connected to the server
Preparation
Before we can run the installation script, we must first install the required programs. Since Bitwarden will later run in a Docker container, Docker must be installed first.
If you don’t know what Docker is, you can learn more about Docker here.
In addition, there are other smaller packages like curl.
The required programs can be installed with the following command:
apt install docker.io docker-compose curl -yDownloading the installation script
Downloading the script is quite simple and done with one command.
Additionally, the script is made executable. Use the following command for this:
curl -s -o bitwarden.sh \

https://raw.githubusercontent.com/bitwarden/server/master/scripts/bitwarden.sh \

&& chmod +x bitwarden.sh
Running the installation script and installation
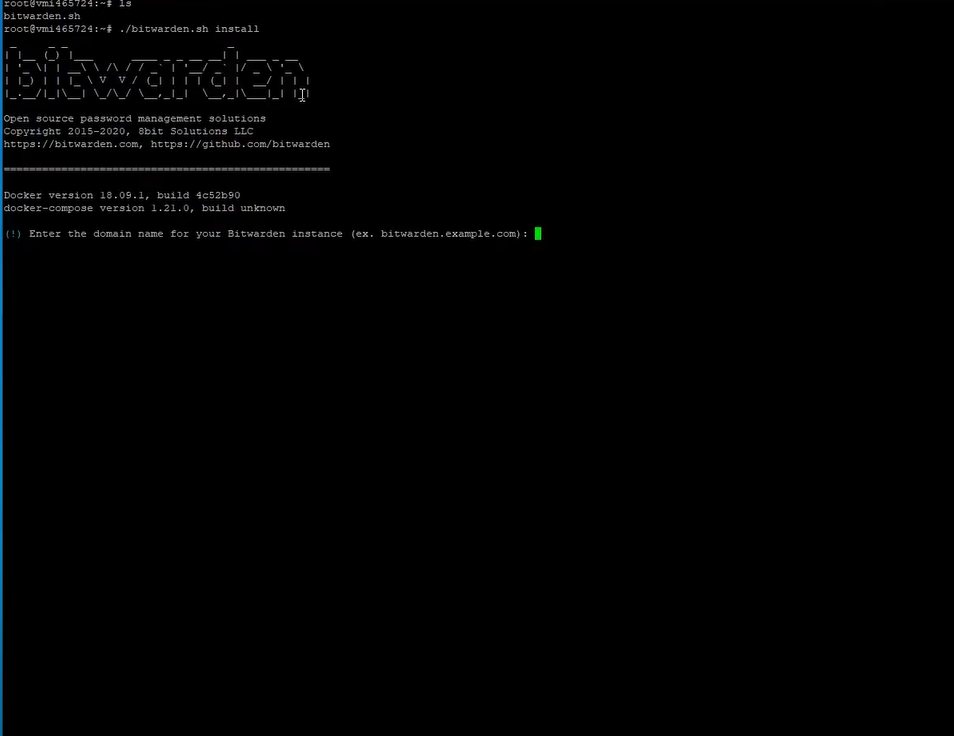
To start the installation, run the installation script with the following command:
./bitwarden.sh installNow you will be prompted to enter your (sub)domain:
In the next step, you can select whether a free SSL certificate from Let’s Encrypt should be installed directly. This step is optional, but since it will be a storage location for your passwords later on, it is highly recommended to install a certificate:
If you decide to install an SSL certificate, you will need to enter your email address in the next step.
After the certificate has been installed, you need to register your instance with Bitwarden.
To do this, go to https://bitwarden.com/host and enter your e-mail address on this page.
After that you will receive an installation ID and an installation key, which you have to enter into the console.
You will be asked for the installation ID first:
And then the installation key:
After you have entered these two keys, the script installs the rest and your instance is active.
Now call your (sub)domain in the browser and create an account there.
Congratulations! Your Bitwarden instance is now fully installed and ready to use.
If you want to run more than just Bitwarden on your server, the following chapters are important for you:
Install Vaultwarden Server (Bitwarden)
If you want to run other things on your server in addition to your Bitwarden instance, this variant is much more suitable for you.
Here a modified version of Bitwarden, namely Vaultwarden, is used. This is an implementation of the Bitwarden API in a Rust program that also runs in a Docker container.
Requirements
- A server with Linux operating system (e.g. a VPS)
- Root access to the server
- A (sub)domain already connected to the server
Preparation
Before we can start installing Vaultwarden, we need to install some programs in this variant as well.
The required programs can be installed with the following command:
apt install apache2 docker.io docker-compose curl git wget sudo certbot python3-certbot-apache -y Create a Virtual Host
To tell the web server which port Vaultwarden is running on, we first need to insert a Virtual Host. We create this with the following command:
nano /etc/apache2/sites-available/bitwarden.confAnd paste in the following content:
<VirtualHost *:80>

    ServerName <Your(Sub)Domain>

    ProxyPreserveHost On

    <Proxy *>

        Order allow,deny

        Allow from all

    </Proxy>

    ProxyPass / http://localhost:8081/

    ProxyPassReverse / http://localhost:8081/

</VirtualHost>
Important: Replace <your(sub)domain> with your (sub)domain under which the Bitwarden instance should be accessible. The brackets (i.e. “<” and “>” must be removed!).
Now activate the virtual host with this command
a2ensite bitwarden.confActivate required modules
In order for the web server to work properly, some modules need to be enabled. This is done with this single command:
a2enmod ssl proxy proxy_http proxy_balancer lbmethod_byrequestAfterwards, the web server must be restarted so that all changes are applied. This can be done with this command:
systemctl restart apache2Install SSL certificate
Unlike the first variant, the SSL certificate must be installed manually here.
However, this is quite simple. To do this, start the certification process with this command:
certbot --apache The following certification process is pretty self-explanatory, which is why it will not be discussed further here.
Download and run Vaultwarden
After all the preparations are complete, we can download the Vaultwarden image with this command:
docker pull vaultwarden/server:latestAfter downloading the latest image of Vaultwarden, the container can be started with the following command:
docker run -d --name vaultwarden -v /vw-data/:/data/ -p 8081:80 vaultwarden/server:latest Now go to your (sub)domain in the browser and create an account there.
Congratulations! Your Vaultwarden (or Bitwarden instance) is now fully installed and ready to use.


