Ultimate Guide to SSL

Introduction
In the rapidly evolving digital landscape, the need for secure and private communication on the internet has become more crucial than ever. This is where SSL (short for: Secure Sockets Layer) comes into play. SSL is a fundamental technology that ensures encrypted connections between web servers and browsers. This is archived by safeguarding sensitive information like passwords and protecting users from cyber threats. In this comprehensive guide, we will explore the world of SSL, its historical context, and its significance in modern web usage.
SSL, first introduced by Netscape in 1994, revolutionized the way data is transmitted over the internet. It provided a secure layer of encryption, making it increasingly difficult for attackers to intercept and decipher sensitive information exchanged between users and websites. Over the years, SSL has evolved into Transport Layer Security (TLS), encompassing newer versions and stronger cryptographic algorithms to enhance security.
System Rescue CD: First Steps
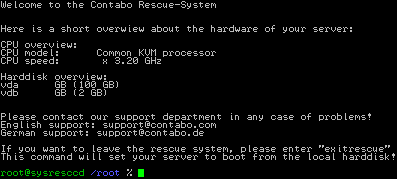
Many of you have already heard about it or even used it once in a while, but most of you have probably not been introduced to it yet: Our rescue system! While hopefully not being needed at all, it provides many possibilities to fix certain problems and to bring the machine back online as soon as possible. When the server is down, every second counts. It is important to know what to do beforehand. Thus, I will provide you with some basic information first:
SRV Records – How do I use them correctly?
Definition of an SRV record
With a Service Resource Record (short: SRV record) you can make services, which are usually available via an IP:PORT combination, reachable using a DNS host name. Important to note regarding SRV record is the fact, that they only work if an application has been specifically programmed to make use of them. Examples for this are TeamSpeak3 or Minecraft. SRV-Records can not be used to point a DNS name to an IP address/port combination for arbitrary use by any application.
Example – Teamspeak:
Usually TeamSpeak is using the protocol UDP over port 9987. If you are running a TeamSpeak instance with the IP 123.124.125.126 every client that wants to connect has to enter the IP:port combination of 123.124.125.126:9987. If you change the port or the server IP, you have to inform everyone about the new combination. With SRV records it is possible to connect to TeamSpeak using a DNS host name like ts.mydomain.com
How to Configure Cloudflare in front of Your Website or Application

Cloudflare
is a content delivery network (CDN) that provides a range of services,
including DDoS protection, caching, and website optimization. By configuring
Cloudflare in front of your website or application, you can take advantage of
these services to improve the performance and security of your site. However,
setting up Cloudflare can be a daunting task for those who are unfamiliar with
the process. In this article, we will provide a step-by-step guide on how to
configure Cloudflare in front of your website or application, so you can start
enjoying the benefits of this powerful CDN. Whether you’re a seasoned developer
or a beginner, this guide will help you get up and running with Cloudflare in
no time.
Create a Cloudflare Account
The
first step in configuring Cloudflare for your website or application is to
create an account. Go to the Cloudflare website and
click on the “Sign Up” button. You will be prompted to enter your email address
and create a password. Now check your email inbox to verify your email address.
Once you have completed this step, you will be directed to the Cloudflare dashboard
which looks like this:

Add Your Website to Cloudflare
The
next step is to add your website to Cloudflare. To do this, click on the “Add
Site” button and enter your website URL:

Cloudflare
will then scan your website to determine its DNS records.
Choose a Cloudflare Plan
Cloudflare
offers a range of plans, from a free plan to more advanced plans that offer
additional features. Choose the plan that best suits your needs and click on
the “Continue” button.

In
this example we will choose the “Free”-Tier.
Update Your DNS Settings
Once
this is done, Cloudflare will display a list of DNS records for your website.
If there are already some entries, verify that these records are correct or
delete them and then click on the “Continue” button.

Now
Cloudflare will display new nameservers that you need to update on your domain
registrar’s website. This is usually where you purchased your domain name. For
Contabo customers this can be done via the Customer
Control Panel (CCP) at my.contabo.com. Your DNS settings can be
updated under “DNS Zone Management”. If you want to learn more about DNS Zone
Management, check out this article. If you are
with some other provider, you will need to log in to your domain registrar’s
website and update the nameserver records with the ones provided by Cloudflare.
Verify Your DNS Settings
Once
you have updated your DNS settings, go back to the Cloudflare dashboard and
click on the “Done, Check Nameservers” button. Cloudflare will then verify that
your DNS settings have been updated correctly. This may take some time, so be
patient. Cloudflare will send you an email if these DNS settings have been
updated.
Connect your Server with your Domain on
Cloudflare
After
your DNS settings have been updated, it’s time to connect your server with the
Domain you set up at Cloudflare. To do so choose “Websites” in the left
menu:

Now
click on your Domain:

And
select “DNS” in the left menu:

To
connect your server with this domain, click on “Add record”:

- Now leave the “Type” on
“A”.
- For “Name” enter your Domain
(e.g. test.com)
- For IPv4 address enter the IPv4
Address of the server you want to connect with your domain (In Contabo
this can be found in the Customer Control Panel –> Your Services)
- Now click on “Save”
In
our example it looks like this:

Now
it will again take some time to update your DNS settings. Again: It can take up
to 24 hours but will usually be done in a few minutes.
Enjoy the Benefits of Cloudflare
Congratulations! You
have successfully configured Cloudflare in front of your website or
application. Cloudflare will now provide a range of services to help improve
the performance and security of your site, including DDoS protection, caching,
and website optimization.
Subscribe to:
Posts (Atom)


